12-String Guitar Building
Learn how traditional ladder-braced guitars were made—and how to build your own. Guided by master luthier Brad Goodman, you’ll follow the complete process of creating a 12-string Stella-style guitar, gaining deep insight into the construction, tone, and heritage of these timeless instruments.
Buy Now $297.00 83 Lessons 10:30:18
Free Videos
Promo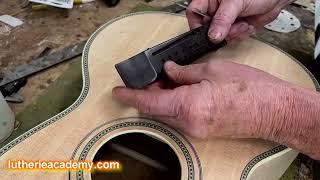
About This Course
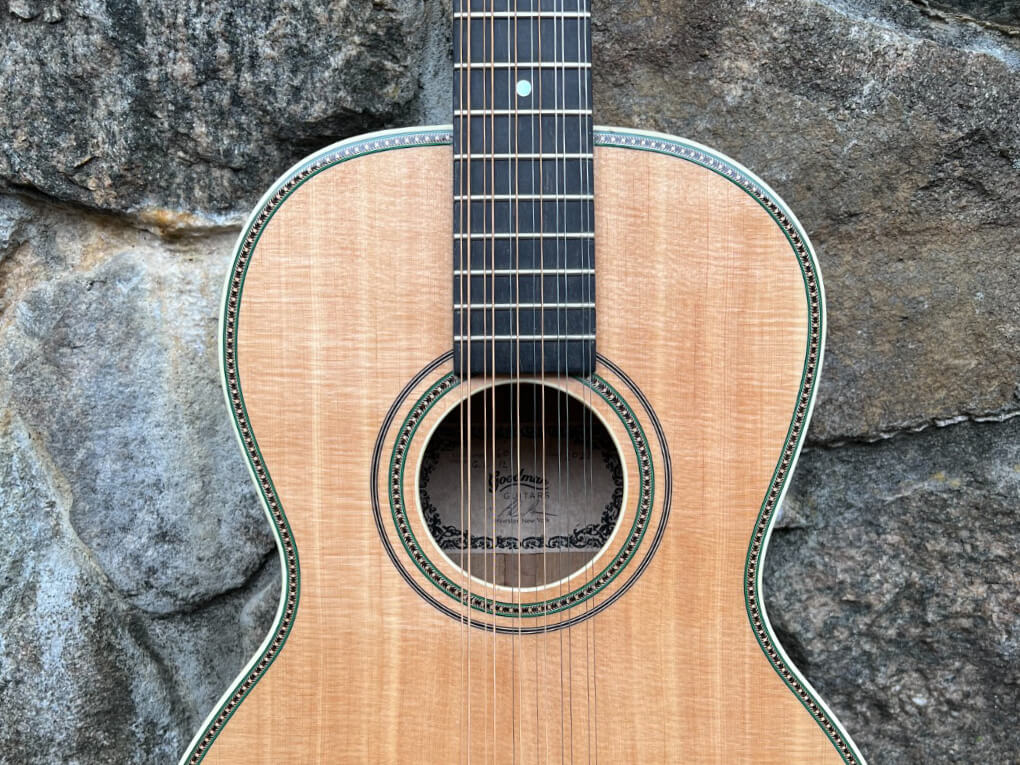
Brad Goodman, of Goodman Guitars, is a luthier who has been handcrafting instruments for more than 50 years. He is well-known for building various styles, including: Archtops, Flattops – both x braced and ladder braced, as well as classicals. He specializes in reproduction-style guitars, particularly those based on the vintage Stella and Regal guitars from the 1920s and 1930s. These vintage guitars are famously built with ladder bracing and are associated with early blues, ragtime, and folk music. Ladder bracing is one of the earliest and simplest forms of internal bracing for an acoustic guitar's soundboard. It consists of a few strips of wood glued horizontally (perpendicular to the grain) across the guitar top, resembling the rungs of a ladder. This simple structure typically results in a sound that is often described as: Treble-friendly or "boxier", Loud and dry with less sustain and fewer overtones compared to modern X-braced guitars. This type guitar is Excellent for fingerpicking blues, ragtime, and folk, where a focused, fundamental tone is desired.
In this course he shows how to make a 12 string ladder braced guitar based on the Stella design. A six string guitar can also be built following Brad’s instructions. This course shows everything from wood selection to the finished guitar. It also comes with a set of downloadable plans. If you are interested in how to make a ladder braced guitar or just want to learn how they are made and the history behind them, then this is the course for you.
Learn about:
- History of ladder braced guitars with examples
- Materials used for ladder braced guitars
- Models of traditional ladder braced guitars
- 12 string and six string scale lengths for these guitars
- Wood selection – why white oak was used
- Top thicknesses
- How to bend sides by hand
- Bracing design
- Traditional rosettes and binding/purfling schemes
- Dovetails – how to cut and fit the joint
- And much more!!
Please read the FAQ page before beginning. To begin just register/login and purchase the video lessons. After purchasing, you can watch the lessons through this page and download your included PDF in the downloads section. Happy Building!