Advanced Ukulele Building with Jay Lichty
The ukulele is a fun instrument and has become quite popular over the years. Learn how to make yours! You will have bragging rights as well as the “know how” to build high quality ukuleles on your own in your own shop.
Buy Now $327.00 96 Lessons 18:24:49
Free Videos
Promo
About This Course
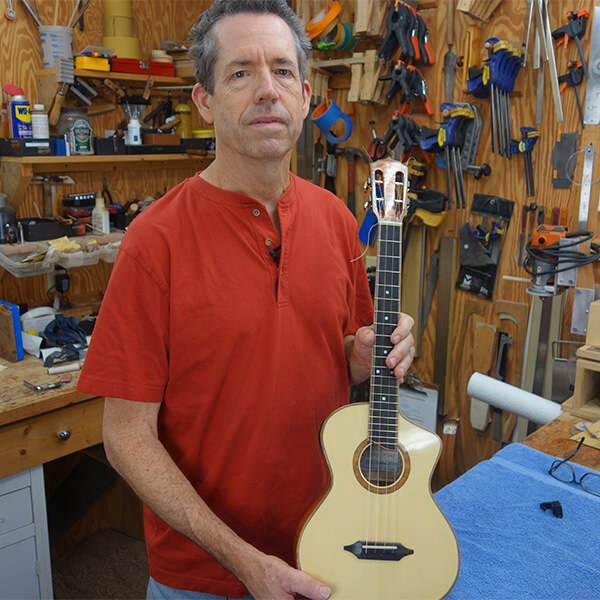
Welcome to the Robert O'Brien Online Advanced Ukulele Building Course. In this course Robert invites world renowned luthier, Jay Lichty of Lichty Guitars and Ukuleles, to show how he builds his world class concert ukuleles. Jay doesn't hold back and includes many advanced features he uses on his instruments like a zero fret, soundport, arm bevel, slotted and bound headstock, bound fretboard, mitered purflings, and a cutaway!! He also shows how he achieves a professional high gloss finish using water based products.
The course is divided into 12 chapters, each containing easy to follow lessons filmed in high definition video. You start with a pile of lumber and progress to a finished high quality instrument with all the bells and whistles Jay puts on his own custom instruments.
In addition to the detailed step by step instructions on how to build a tenor ukulele, the course also includes an interview with Jay and his wife, Corrie, on how to market your work.
This course is intended for those that have already built an instrument or two but has something for everyone, including features that can be used on instruments other than ukuleles. If you want to take your ukulele and instrument making to the next level then this course is a must!
Please read the FAQ page before beginning. To begin just register/login and purchase the video lessons.
I bought the advanced Ukulele building class and liked it very much. Roy
Feedback
×I have used Lichty’s course and can highly recommend it. I like that it includes cutaways, arm bevels, ducted sound ports and other goodies. Roger
Jay Lichty goes into plenty of detail in Robbie's Advanced Uke course for the arm bevel, and also ducted sound ports, cutaways and other fun stuff. Roger
I have Jay’s ukulele course. There’s a lot of great stuff in there. I recommend it if you want to build professional quality ukuleles. Brock
I put the strings on my second guitar build today. I followed your on-line Classical Guitar course and added some ideas from Jay Lichty’s Advanced Ukulele course(side sound port design and bound fingerboard). Both courses have great detailed step by step instructions. Thanks again for these wonderful resources. Ken
I just recently purchased the advanced ukulele course and am finding a lot of useful information within the videos. Cody
Great course! I learned a lot in that course. I now apply to guitar builds. Jeremy
Robbie, both of your uke courses with Jay and Heidi have come in handy through several of my build. Tony
I bought the advanced Ukulele building class and liked it very much. Roy
After finishing your course with Jay Lichty, I landed a commissioned build for a baritone ukulele from a client in Australia and just finished the instrument last week. Your course has influenced my work and I was able to put many of the things I learned into practice on this project to refine my skills and make the instrument better. I am extremely happy with how this instrument feels, looks, and sounds... Christopher
Last year my dad bought me your advanced ukulele building course with Jay Lichty. We watched it together and found it very informative! The little things you and Jay mentioned that improve consistency and save time are particularly helpful to me. It was also really cool for me to watch because it validated everything that my dad has taught me about building and also given us alternative ways to do several jobs that work really well. Christopher
I’ve been going through the Uke building vids. Nicely done, lots of info I can apply to my guitar making. Thanks for a great service. Eric
When Robbie began spreading the word that a ukulele course featuring Jay Lichty was in the works, I got in line to purchase the series. I have had no regrets. There is excellent camaraderie between him and Robbie from off-camera. The videos are fun! John Calkin - American Lutherie magazine
These videos are great. I’m already halfway through chapter 2 and learning a lot. Kawai
Jay is perfect teaching the craft and your back and forth with him adds a lot to the experience. It doesn't seem like a stuffy "how to" video. I am honestly impressed. You guys knocked it out of the park for a newbie like me. Barry
I recently completed a pair of longneck tenor cutaway ukuleles inspired by Robbie and Jay Lichty's video course. These really stretched my abilities with many firsts: cutaways, arm bevels, ducted sound ports, French polish, more ambitious rosettes and binding schemes, resawing/thicknessing sides and backs, etc. I loved the video course. Roger
I must say between the two of you guys, I feel more confident than ever. Jay is awesome, and pretty funny. He’s easy to watch. His building style is pretty laid back. Charles
Really enjoyed Jay's OOOOOOOOOkulele course, and I also did Robbie’s acoustic course which was also excellent. Chris
I tried for my first true high gloss finish following Lichty's advanced uke course. I highly recommend it. I'm real happy with the finish Bruce
Your online Advanced Ukulele Building with Jay is chock full of good information! Tony
Just because Jay builds a uke with all the bells and whistles doesn't mean a beginner has to employ those tricks, so his videos will work just as well for a first-time builder. I picked up solid tips from both Heidi's and Jay's videos. John Calkin
This morning I purchased Jay Lichty's Advanced Ukulele Building course. I've long wanted to go to a guitar or uke building workshop, but just couldn't justify the high cost, especially when travel and lodging costs were considered. the videos are of extremely high quality. I downloaded all 18+ hours to my SSD storage drive so I could watch them off-line, although online viewing is an option if so desired. Tony
I too found the videos worthwhile. They confirmed that I am doing many things right, and also gave me many ideas on how to improve my instruments. Kevin
I found the Jay Lichty uke videos to be money well spent, even after 40 years of building. John Calkin
Robbie's and Jay's Advanced Uke video course is excellent! Tony
Thanks Jay and Robbie! I loved your course! Even methods that I didn't use were useful to observe and learn. My favorite was the arm-rest bevel. It took some very careful work but came out well. Howard
The Advanced Uke Building videos have already paid for themselves with all of the information I've already gleaned from them. I'd love to do a hands-on course like Robbie's building workshop. Tony
I'm really enjoying your advanced uke course with Jay. I think it will help me in my future projects. I'm currently working on my 4th and 5th instruments, a nylon tenor guitar and a kasha tenor uke. Tony
I just purchased Robbie's and Jay's Advanced Ukulele Building Course, and have already watched several hours worth of footage. Great stuff! Scott
I really enjoyed the course and learned a lot from it. I really appreciated him showing that he made mistakes and how he fixed them. I found his statement about needing to love fixing your mistakes as much as you love building to be profound and very helpful. Keep up the good work. Mark
Just a note to thank you for publishing the advanced ukulele building course with Jay Lichty. I have been a luthier on and off for 30 years and nonetheless still found so much to learn from Jay's teachings and technique. As importantly Jays's positive personality really showed. All in all a thoroughly enjoyable set of instructions. Steve
Recently purchased the Jay Lichty Ukulele course. Love it. David
This video course is awesome. Every step to build a fully featured tenor ukulele is demonstrated by Jay, one of the best custom builders out there. Robbie O’Brien is a great luthier/videographer and provides his experienced commentary to Jay’s detailed creative process. The chapter on top bracing and voicing alone is worth the price. It’s like being in the shop with 2 master luthiers. And you can almost smell that Brazilian coffee... Tom
I also loved the Chapter 12 tips and the candid interview with Jay and Corrie. I especially liked their comments on instrument pricing. I found the course entertaining, useful, and inspiring. I can’t imagine a luthier, experienced or novice, not finding plenty to like about this course. Well worth the price of admission! I spend that amount of money on tools and materials without a second thought. And this course is most certainly a tool. I’m pretty excited about doing an actual build using Jay’s methods, and I plan to get started almost immediately. Howard
This course is excellent! Robbie’s teaching and speaking skills are already legendary, and his camera work and editing capabilities are highly evident in this video course. As it turns out, Jay is a skilled teacher and speaker as well, whether he knows it or not...and his efforts in this course did not disappoint. As an experienced builder (37 instruments) my expectation from this course was to be entertained, pick up a few tips, and to learn a new skill or two such as arm-bevels, cutaways, peghead binding, bolt-on necks, spray finishing, etc. And I’ve already accomplished the entertainment and tips parts with just one viewing. Jay’s direct get-it-done philosophy will keep a novice from getting too bogged down in jig building and tool acquisition. Thank you Jay and Robbie! Howard
LOVED the course! Jay was just awesome. Great bloopers! That label pen drip was epic! Ray
Congratulations Robbie and congratulations to Jay as well! Wow! Looks very thorough with lots of bells and whistles too! I'm sure I'll learn a lot. I haven't built an ukulele yet, but I'm sure this will help. Thanks again for the fine instruction you make available through these courses. Rolo
Even though I've built 37 ukuleles, this was not a hard purchase decision for me at all. There's no way that Jay and I use identical building methods, so I'm guaranteed to learn some things from this course. Compared to the costs involved for an in-person class, online courses such as this are a huge bargain! Howard