Electric Guitar Building

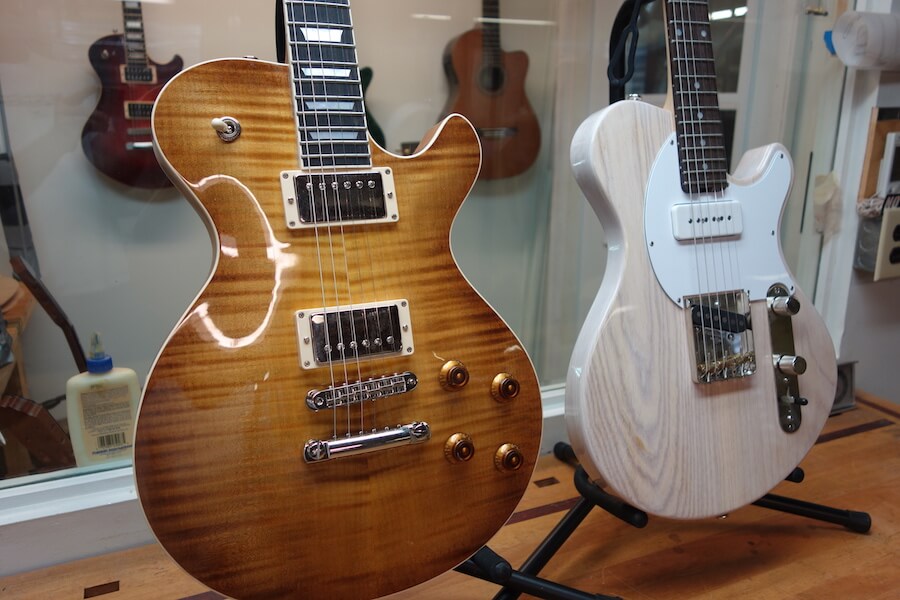
Build a tele style or Les Paul style electric guitar with Luthier Mike Snider of Snider Guitars. The information provided in this course makes it easy to build your own electric guitar.

Buy Now $287.00 161 Lessons 14:38:25

About This Course

Welcome to the Robert O’Brien Online Electric Guitar Building Course. In this course Robert invites Mike Snider of Snider Guitars to show how to design, build, finish and setup two types of electric guitars, a Tele type model and a carved top model similar to a Les Paul. With over 15 hours of high quality video and audio instruction divided into 22 chapters, this course also shows to inlay on the fretboard and peghead as well as wind your own pickups! The finishing chapter shows how to execute a UV cured high gloss polyester clearcoat finish over colorcoats.

When purchasing the entire Online Electric Guitar Building Course, Robert will also include the finishing chapter from his Online Acoustic Guitar Building Course for free. In it he shows how to do a traditional high gloss or satin lacquer finish. You will also get a free set of Tele/Strat style and Les Paul style plans as well as wiring diagrams and templates for the two guitars built in the course.

You also become eligible to join Robert’s invitation only chat group. Here he offers advice and support as you build. There is a wealth of information available to you for free!

If you have ever wanted to design and build your own electric guitar from beginning to end then the Robert O’Brien Online Electric Guitar Building Course with Mike Snider is a must!

Please read the FAQ page before beginning. To begin, just register/login and purchase the video lessons. Chapters 6, 10, 14, 17 and 20 can be purchased separately. It has never been easier to learn the art of electric guitar building.

Happy Building!!

Hey Robert, just wanted to let you know that awhile back I purchased the electric guitar building course and it was a great investment. I also reached out to Mike and told him how awesome this was. I have built 13 acoustics but this was my 1st Tele style build. I watched the entire course then I go back and review before each step. I am almost ready for finish. A year ago I purchased your Venetian cutaway course and it to was Awesome. Thanks for what you do! Donnie
See what others are saying

Feedback

×
I bought Robbie's Electric building course about 3-4 years ago, and 3 Christmases ago my son gave me a body blank for an electric and said "we should build 2 guitars together." That XMass present cost me at least $500 so far, but it was worth it in the time we spent together. We decided I'd build the Les Paul style for me, and he'd build the Tele-style. I would recommend the course without reservation, as we ended up with 2 beautiful guitars that sound and play well. Bruce
I just finished my first electric guitar based on your course and I am very pleased with the result. Ghislain in Canada
The electric guitar building class is wonderful. Near the top of my list of favorites. Mike is an excellent luthier and a fine instructor. Rick in New Mexico
I also appreciate you and Mike putting out this course. I have built a few acoustics, and now with your help I have finished a couple electrics. Your help was invaluable to me getting started with everything. Many thanks! Gavin
Once again I just wanted to thank you and Mike Snider for the Awesome job on the Electric guitar building course Can't say enough how much I would recommend this course. Look forward to my next course with you! Have a Great day," Donnie
Hey Robert, just wanted to let you know that awhile back I purchased the electric guitar building course and it was a great investment. I also reached out to Mike and told him how awesome this was. I have built 13 acoustics but this was my 1st Tele style build. I watched the entire course then I go back and review before each step. I am almost ready for finish. A year ago I purchased your Venetian cutaway course and it to was Awesome. Thanks for what you do! Donnie
I have recently bought your electric guitar online course as well as the sharpening course. I’m really enjoying the electric build course even though I’m barely getting into it. Eddie
I finally finished this guitar. It is my first electric and the third overall. The course was great and I had a blast building this LP style guitar. Joe
I'm really enjoying the electric guitar building course. I've been building for about a year now and there is a ton of useful information. Kevin
I really appreciate the videos. I probably wouldn't be building if not for the electric guitar building videos with Mike Snyder. Robert
I recently took the electric guitar building class on your site - it was excellent. Jonathan
I am a detailed type of person who likes to know all the exact details before embarking on a woodworking or building project. Mike is great, his attention to detail and continuing explanations are exactly what I love to hear. I am part way through the course and just had to write you to say how terrific his style is !! Please pass on my compliments to him. John
The electric was a blast! Man, what a marathon! Thanks for all that you do for the craft and us newbies! Ken St. John
Thanks for the awesome video instruction!!! Nathaniel
Great FAQ’s and super lessons. Very clear and informative. Mark C
Chapter 1 • Design
51:18
Lesson 1: The Centerline 5:50
Lesson 2: The Scale Length 4:08
Lesson 3: The Bridge 3:47
Lesson 4: Fretboard Layout 7:47
Lesson 5: Pickup and Controls Layout 8:26
Lesson 6: The Body 3:44
Lesson 7: The Headstock 17:36
Lesson 8: Cutting Out the Plans 2:03
Chapter 2 • Templates
36:35
Lesson 1: The Body Template 5:12
Lesson 2: Pickup Templates 8:05
Lesson 3: Tele Bridge Pickup Template 3:39
Lesson 4: Neck Template 5:48
Lesson 5: Carved Top Template and Design Ideas 7:37
Lesson 6: Carved Top Control Cavity Template 6:14
Chapter 3 • Body Blank Prep
26:25
Lesson 1: General Description 2:08
Lesson 2: Jointing and Gluing the Maple Top 11:51
Lesson 3: Prepping the Ash Blank for the Tele 1:48
Lesson 4: Prepping the Mahogany Blank 5:19
Lesson 5: Cutting Out the Tele Blank 5:20
Lesson 6: Thicknessing the Maple Top 3:08
Lesson 7: Cutting Out and Routing the Maple Top 6:10
Lesson 8: Chambering 3:42
Lesson 9: Routing the Carved Top Control Cavity 9:01
Lesson 10: Routing the Toggle Switch Channel 2:59
Lesson 11: Gluing the Maple Top 4:34
Chapter 4 • Routing Cavities
14:44
Lesson 1: The Tele Control Cavity Template 3:06
Lesson 2: Transferring Tele Measurements 5:11
Lesson 3: Routing Tele Cavities 3:14
Lesson 4: Routing the Carved Top Cavities 3:13
Chapter 5 • Shaping and Drilling
33:51
Lesson 1: Flush Trimming the Carved Top 4:09
Lesson 2: Rounding the Edges 3:37
Lesson 3: Input Jack Holes 6:40
Lesson 4: Arm Bevel 3:30
Lesson 5: Tummy Cut 3:03
Lesson 6: Binding Channels 4:33
Lesson 7: Carved Top Neck Angle 8:19
Chapter 6 • The Neck
2:11:51 $68.00 Buy Chapter
Lesson 1: Neck Overview 1:21
Lesson 2: Thicknessing the Fretboard 2:33
Lesson 3: Slotting the Fretboard 10:12
Lesson 4: Tapering the Rosewood Fretboard 5:48
Lesson 5: Tapering the Ebony Fretboard 11:03
Lesson 6: Binding the Fretboard 10:10
Lesson 7: Three Types of Necks 6:44
Lesson 8: The Scarf Joint 8:21
Lesson 9: The One Piece Neck 9:49
Lesson 10: More Scarf Joint Necking 5:52
Lesson 11: More Tele Necking 5:49
Lesson 12: Truss Rods 4:37
Lesson 13: Installing the Double Action Truss Rod 7:54
Lesson 14: Installing the Compression Truss Rod 25:41
Lesson 15: Yet Another Truss Rod Installation 6:02
Lesson 16: Widening the Headstock 2:06
Lesson 17: Thicknessing the Headplate 1:07
Lesson 18: Attaching the Rosewood Fretboard to the Maple Neck 9:02
Lesson 19: Mahogany Neck Headstock 10:49
Lesson 20: Flush Trimming the Maple Neck 1:36
Lesson 21: Drilling Tuner Holes for the Maple Neck 2:27
Lesson 22: Thicknessing the Maple Headstock 9:27
Lesson 23: Shaping the Mahogany Headstock 7:06
Lesson 24: The Neck Tenon 13:26
Chapter 7 • Attaching the Necks
44:45
Lesson 1: Routing the Neck Pocket 6:03
Lesson 2: Fine Tuning the Fit 12:42
Lesson 3: The Tele Neck Pocket 6:51
Lesson 4: Bolting on the Tele Neck 11:59
Lesson 5: Gluing on the Fretboard 7:10
Chapter 8 • The Carved Top Body
21:39
Lesson 1: Shaping the Top 9:11
Lesson 2: Binding the Guitar 8:45
Lesson 3: Scraping the Binding 3:43
Chapter 9 • Neck Shaping
35:40
Lesson 1: Flush Trimming 1:19
Lesson 2: Thicknessing 6:20
Lesson 3: Shaping the Mahogany Neck 18:41
Lesson 4: Drilling Tuner Holes 4:52
Lesson 5: Shaping the Maple Neck 4:29
Chapter 10 • Inlay
1:13:00 $58.50 Buy Chapter
Lesson 1: Side Fret Markers 6:40
Lesson 2: Prep and Layout 10:31
Lesson 3: Routing 11:24
Lesson 4: Gluing the Inlay 7:38
Lesson 5: Cutting Out MOP 21:08
Lesson 6: Routing Headstock Logo Cavity 11:21
Lesson 7: Gluing the Logo 4:19
Chapter 11 • Fretboard radius
13:27
Lesson 1: The Coumpound Radius 13:27
Chapter 12 • Control holes
11:22
Lesson 1: Drilling Control Holes 11:22
Chapter 13 • The carved top neck
4:59
Lesson 1: Gluing in the Neck 4:59
Chapter 14 • Fretwork
58:29 $41.00 Buy Chapter
Lesson 1: An Unbound Fretboard 15:21
Lesson 2: Fret Ends 8:47
Lesson 3: Leveling 5:26
Lesson 4: Re-Crowning 9:21
Lesson 5: Final Dressing 7:51
Lesson 6: A Bound Fretboard 11:43
Chapter 15 • The Bridge
24:11
Lesson 1: Carved Top Bridge Layout 12:50
Lesson 2: Groundwire 1:43
Lesson 3: The Tele Bridge 9:38
Chapter 16 • Finishing
1:16:54
Finishing Overview 2:36
Lesson 1: Types of Finishes 2:54
Lesson 2: Surface Prep 3:53
Lesson 3: Pore Fill 8:26
Lesson 4: Popping the Grain 4:11
Lesson 5: Tru Oil 8:26
Lesson 6: Sanding 2:18
Lesson 7: The Sunburst 10:59
Lesson 8: Scraping Bindings 2:56
Lesson 9: More Pore Fill and Prep 4:52
Lesson 10: Spraying 2:33
Lesson 11: Leveling 10:22
Lesson 12: Buffing 4:48
Lesson 13: Satin Finish 4:30
Lesson 14: Removing Tape 2:50
Bonus 1: Finish Overview • From Acoustic Guitar Course 2:56
Bonus 2: Rounding the Bindings 4:11
Bonus 3: Gap Filling 1:20
Bonus 4: Sanding the Neck 8:37
Bonus 5: Sanding the Body 8:35
Bonus 6: Masking for Bridge 7:40
Bonus 7: Pore Filling Prep 9:38
Bonus 8: Pore Filling 19:06
Bonus 9: Masking the Fretboard 5:36
Bonus 10: Spray Equipment 5:55
Bonus 11: Spraying Sealer 10:05
Bonus 12: Spraying Explanation 5:15
Bonus 13: Sanding the Sealer 19:36
Bonus 14: Spraying Lacquer 12:14
Bonus 15: Sanding the Lacquer 18:58
Bonus 16: Final Spraying 7:38
Bonus 17: Leveling the Finish 24:45
Bonus 18: Buffing the Finish 22:05
Bonus 19: Satin Finish 3:51
Bonus 20: Finishing Conclusion 2:32
Chapter 17 • Pickups
1:36:16 $55.50 Buy Chapter
Lesson 1: What are Pickups 2:31
Lesson 2: Tele Style Bridge Pickup 12:29
Lesson 3: Winding the Pickup 22:19
Lesson 4: Attaching Lead Wires 4:15
Lesson 5: Magnetizing 2:43
Lesson 6: Wrapping 2:42
Lesson 7: Tele Style Neck Pickup 9:25
Lesson 8: Humbucker Pickup 33:55
Lesson 9: Potting 5:57
Chapter 18 • Guards and Covers
14:20
Lesson 1: The Tele Style Pickguard 7:38
Lesson 2: Cavity Covers 4:30
Lesson 3: The Carved Top Pickguard 2:12
Chapter 19 • Assembly
54:24
Lesson 1: Don't Get in a Hurry 0:32
Lesson 2: Installing String Ferrules 1:00
Lesson 3: The Tele Pickups and Bridge 5:46
Lesson 4: The Tele Pickguard 3:03
Lesson 5: The Tele Tuners 5:38
Lesson 6: The Carved Top Bridge 4:40
Lesson 7: Pickups and Mounting Rings 3:03
Lesson 8: More Tuners 2:19
Lesson 9: Strap Buttons 1:52
Lesson 10: Nuts 18:23
Lesson 11: Strings 8:08
Chapter 20 • Setup
19:19 $30.50 Buy Chapter
Lesson 1: Truss Rod 2:39
Lesson 2: Nut Action 4:16
Lesson 3: 12th Fret Action 2:19
Lesson 4: Intonation 3:36
Lesson 5: Pickup Adjustment 2:02
Lesson 6: Final Check 4:27
Chapter 21 • Wiring
24:17
Lesson 1: Shielding 5:15
Lesson 2: The Tele Controls 14:34
Lesson 3: The Carved Top Controls 4:28
Chapter 22 • Finishing Touches
10:39
Lesson 1: A Few More Things 1:39
Lesson 2: The Completed Guitars 9:00