Wooden Hand Planes
Learn how to make, sharpen, set up and use a variety of wooden hand planes in this course presented by traditional woodworker, Thiago Endrigo Silva
Buy Now $227.00 66 Lessons 11:53:31
Free Videos
Promo
About This Course
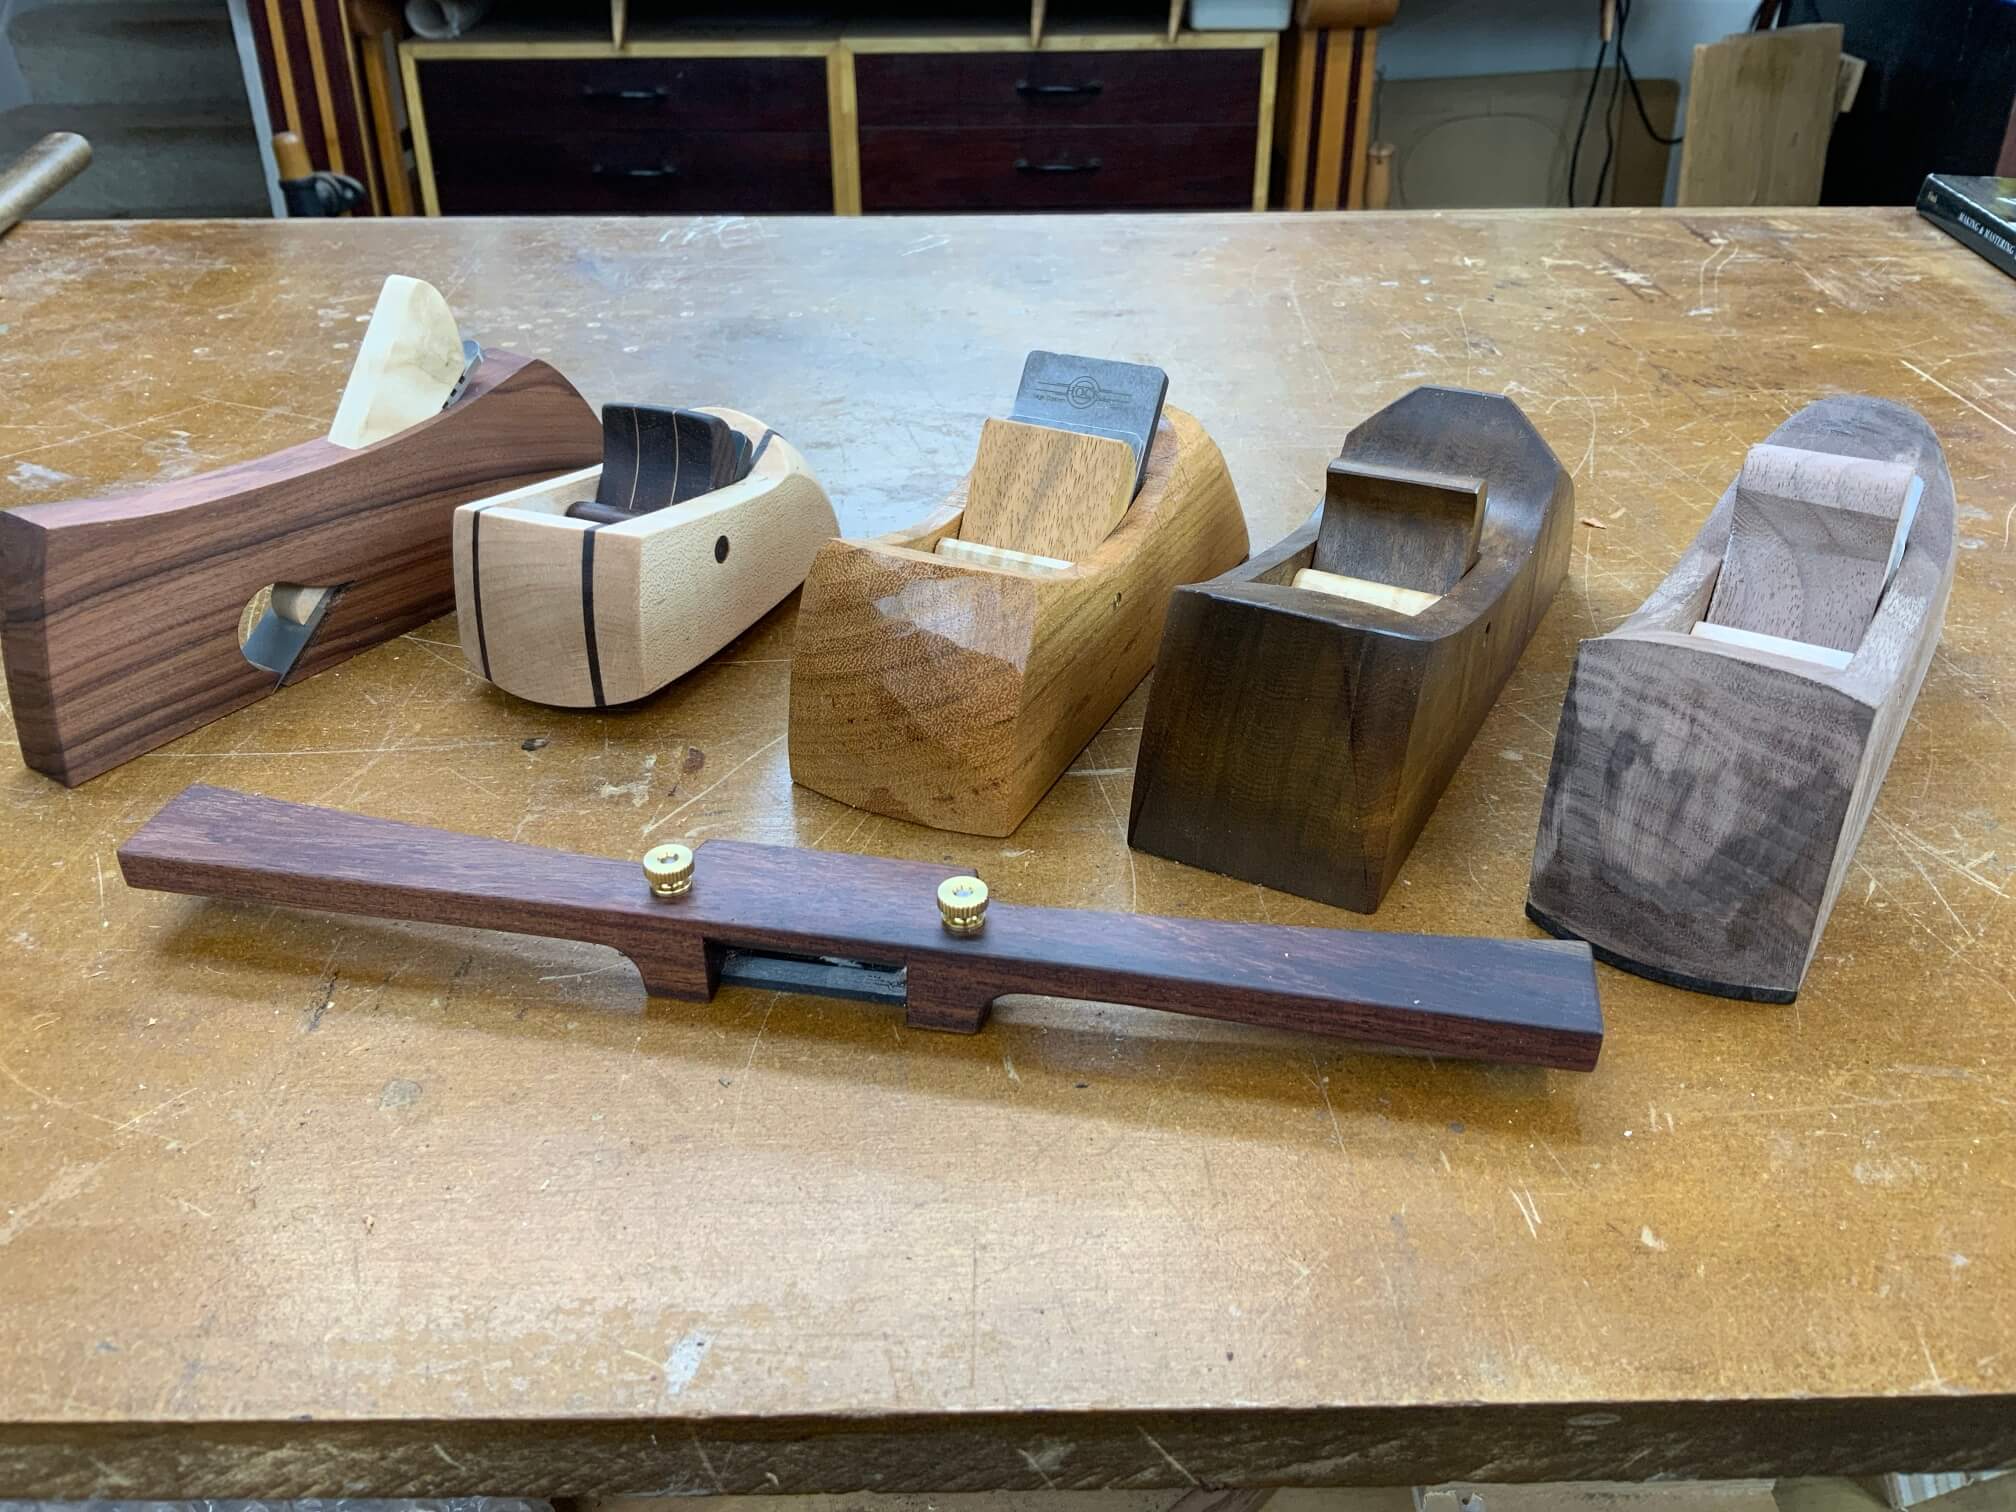
Wooden planes have been a staple in woodworking for centuries and are still highly valued for their craftsmanship and effectiveness. This course, presented by traditional woodworker Thiago Endrigo Silva, covers a variety of key aspects related to plane making, including: Designing and making different types of planes including a smoothing/block plane, shoulder plane, spokeshave and convex sole plane. Thiago will walk students through the entire process from selecting the right materials to design, cutting, gluing, shaping, finishing, and set up and use of the finished plane. After the planes are constructed, sharpening techniques will be covered to ensure they are effective and efficient. One of the best aspects of this course is that you can make a plane with minimal tools and Thiago shows how do it using only hand tools. The project can be completed in a relatively short time, making it a fun and satisfying experience for woodworkers of any skill level. This course is a fantastic way to learn the craft of traditional woodworking and add practical tools to your shop. Since making just one plane can become addictive, you’ll likely end up with a set of custom, handcrafted planes perfect for different tasks.
Learn About:
- Different types of planes and their uses
- Blade and bed angles
- Plane designs
- Different ways to sharpen the blade
- Suitable finishes for wooden planes
- How to set up the plane
- Tempering the blade
- Adding a new sole to an existing plane
- And much more!
If you love woodworking, you should consider this course. I have been making my own wooden planes for about ten years and, golly, is it ever worth it. Doug
Feedback
×Thanks for this. I spent about 40 minutes today building a plane to approximately match my Benedetto palm plane. It was really straightforward after watching most of the course. Rick
Having a plane that you specifically made for a given use is a$$-kickingly good. YOU pick the blade, the angle of the blade, the width of the throat, the length of the bed, even the angle of the sidewalls in relation to the base. Make a block plane that suits you and it will never leave your work apron pocket except to be used or sharpened. Doug
If you love woodworking, you should consider this course. I have been making my own wooden planes for about ten years and, golly, is it ever worth it. Doug
I've actually been waiting for this one and realized that the cost of the next couple of planes that I would like to have would exceed the likely price of the course... So thanks! Rick