Free Videos
Intro
About This Course
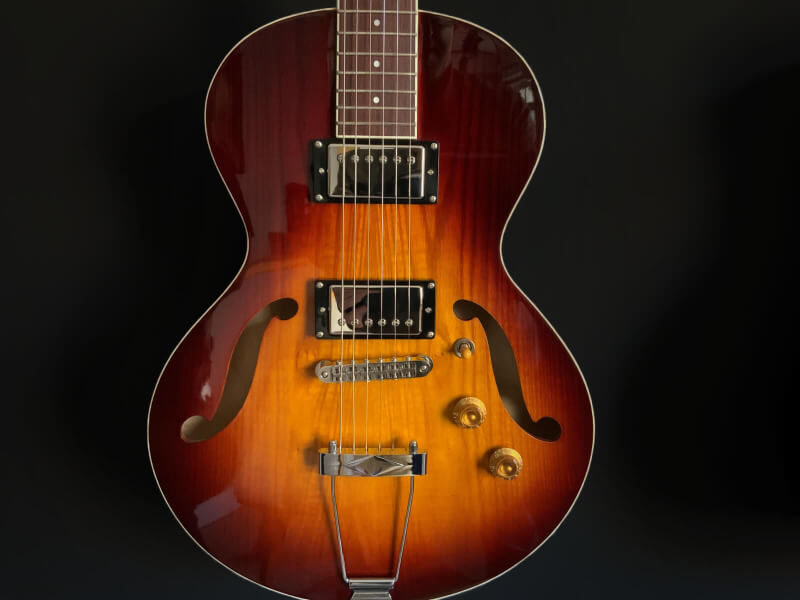
Welcome to the semi hollow body electric guitar building course presented by Brazilian Luthier, João Cassias. This is a fun project loosely based on the iconic Gibson 335 design with creative liberties by João. It doesn’t take a lot of tools, materials or experience to build this guitar and it can be completed in a short amount of time. Join in the fun as João shows you all the steps to build your own semi hollow body electric guitar, with added tips and tricks he has learned over his more than 25 year career as a luthier. A material list and detailed plans accompany the course. Building one of these guitars is like eating potato chips. You can’t stop at just one!
This guitar is great for rock, blues or any style that inspires you.
Please read the FAQ page before beginning. To begin just register/log in and purchase the video lessons.Learn about:
- The history of this iconic guitar
- Materials and tools needed
- Molds and jigs
- How to use hand tools and power tools
- Pickups and electronics
- Cutting binding channels and installing bindings
- How to carve the neck
- Ways to attach the neck to the body with proper neck angle
- How to slot the fretboard
- Fret installation and fretwork
- How to finish your instrument – sunburst and clearcoat
- A simple way to inlay your logo
- How to set up your guitar for optimal playability
- And much more!
“There’s a great flow and organization to this course. This is a great training series with something to offer both seasoned and new builders. I’m really enjoying it!” Michael Whitney - Whitney Guitars and Lutherie School
Feedback
×I just completed the semi hollow body guitar built from your Lutherie Academy course with Joao Cassias.. I really enjoyed the course and had fun with the build. The guitar plays and sounds fantastic. Cliff
It isn't often that a course makes me want to run right to my work bench. I'm suddenly busy again! John
I've been through most of your Semi-hollow electric guitar course twice now. I downloaded the plans and had Staples print them out. They are impressive! I've also begun a semi-hollow electric guitar following the course. I'm going to post progress on Facebook without trying to explain how the work is done. I hope it promotes the course, which I think is not only amazing but a lot of fun. John Calkin
I am enjoying watching my second full course (semi hollow guitar, Cassias) from your site. Just fantastic Jonathan
What a great course! This is exactly what I have been looking for! Thanks. Tim
I just bought the Semi Hollow guitar course, I really like the way this guitar looks. I started watching the course it’s Great.. Very straight forward, I cannot wait to build this guitar.. This is my 4th course I purchased from Luthier Academy. Thanks again! Scott
I bought the semi-hollow body series which is great. Phil
“There’s a great flow and organization to this course. This is a great training series with something to offer both seasoned and new builders. I’m really enjoying it!” Michael Whitney - Whitney Guitars and Lutherie School
The plans for this course are excellent! Definitely made for luthiers! Ramon


