6 Day Acoustic Guitar Building Course
Build a Guitar in 6 days?! The secret is to work efficiently. Learn Robert’s techniques on how to do that in this course. This course offers tips and tricks for beginners to advanced luthiers and is guaranteed to make you a better luthier.
Buy Now $437.00 140 Lessons 26:22:07


About This Course
Welcome to the Robert O’Brien Online 6 Day Acoustic Guitar Building Course. In this course Robert, not only shows how he has updated and adapted his guitar building methods over the years but he also stresses the importance of working efficiently while building. In his original Acoustic guitar building course he teaches how to build and finish a guitar organizing each topic by chapter and lesson. For example: Chapter 1 - The sides, Chapter 2 – The Soundport etc. In this course he has it organized by days and all the steps accomplished on those days, culminating in a completely finished and playable guitar by the morning of Day 6. This means he may start by thicknessing and bending a side, then jump to joining the top and back, doing a scarf joint, making blocks, bending the second side etc. and all of this before lunch of Day one!
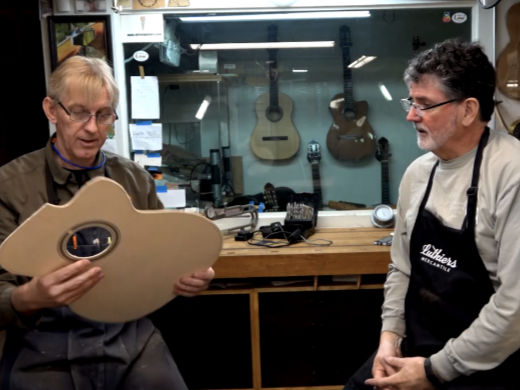
He also does that in the presence of students. This allows the viewer to see and hear Robert address questions and issues that may not arise in a regular style instructional video course with just the instructor teaching. The interaction between Robert and his students allows the viewer to see steps done by Robert as well as his students while he is teaching. Watch as he adapts his teaching style to meet the necessities of each student and their abilities, helping them become efficient in each step of the guitar building process. This is much more than a how to build a guitar course. If you want just that, I recommend getting my original Online Acoustic Guitar Building course. Now, if you want to learn more tips and tricks on building and my most up to date techniques, yes, I have changed my methods somewhat since the original course, as well as how to work efficiently, then this course is for you.
Learn about shop layout and workflow and how that can shave hours and even days off the time needed to build a guitar. Learn how few tools and jigs Robert actually uses while building.
When you purchase the course you also become eligible to join Robert’s invitation only private chat group. Here he offers advice and support as you build. There is a wealth of information available to you for free and over 15 years worth of searchable archives!
If you have ever wanted to learn how to build your own high end steel string acoustic guitar and do it efficiently using Robert’s most up to date techniques, then Robert’s Online 6 Day Acoustic Guitar Building Course is a must!
Please read the FAQ page before beginning. To begin, just register/login and purchase the video lessons.
It has never been easier to learn the art of guitar building.
Happy Building!
Students who have taken Robert O’Brien’s in-house 6-day acoustic guitar building course are eligible for a 25% off discount. Please contact us to claim this offer.
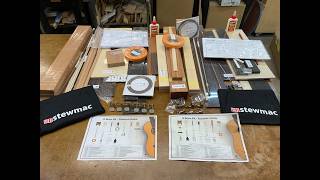
The materials Robert uses are now available at Stew Mac in the USA and Madinter in Europe.
My hand-made wooden block plane is a joy to use because I was able to tune it precisely to the way I use it. I've also found that making and having a special purpose plane for certain luthiery tasks - for example, planing the shoulder of a neck joint when fitting it to the body of a guitar - makes those tasks MUCH easier and faster. Doug
Feedback
×I built a dreadnaught with Robbie a couple of years ago and built an OM with his excellent 6-day guitar building course since then. Al
I have your French polish course and your guitar building course that I have purchased and really appreciate all the information you’ve bestowed to the Luthier community. Rick
I have your acoustic guitar course and love it. Ron
Just wrapped up building guitar #11 for me - my first parlor 12 fret guitar, it really sounds amazing for it's size, maybe my best sounding guitar. Sitka, Olive b/s and cocobolo everything else. Hard to put into words how awesome your online classes are - they have produced some amazing instruments like this one! Brad
My hand-made wooden block plane is a joy to use because I was able to tune it precisely to the way I use it. I've also found that making and having a special purpose plane for certain luthiery tasks - for example, planing the shoulder of a neck joint when fitting it to the body of a guitar - makes those tasks MUCH easier and faster. Doug
I already own the six day course and the acoustic course. They have been the primary source as I have gone through my second attempt at a build. Thank your for those resources!!! They have been invaluable. I have frets, bridge, tuners, and finish left. Thank you for those resources! Billy
I am just finishing a guitar using your online course and have enjoyed learning some new techniques and the guitar is proof positive that your methods work extremely well. Don
I’ve built 22 guitars (mix of Taylor, Gibson J-185, and Martin OM), and starting on 23/24…I build in pairs typically. I build in accordance with your video acoustic course, which I still go over many, many times. What a great course! Skip
Great job on your teaching video. The audio and video quality are excellent and the course seems to be easy to follow. Barry
Warning: This online course may be addictive! (posting for, um, a friend) Peter
Robbie’s courses are excellent and well worth the investment, I have “both” of his steel string classes and both are great. To compliment the course the Voicing class is also excellent for getting the best out of the build. Bruce in Canada
I purchased your 6-day Acoustic Guitar Course earlier this year and watched it through. Thank you so much for offering these courses and youtube videos! Mark
I have been working with the Steel String course video closely as I progress through the steps and wanted to say that they are fabulous. A great investment for any aspiring Luthier. I fell like we are still working together in your basement every time I need to review something. I just need to get some of that acoustic coffee and get Heather to bring in some nice pastries once in awhile. Chris
I just purchased your 6 Day Acoustic Guitar course and am excited to see how you possibly get a guitar built in that time frame! Thank you for what I am sure will be exceptional educational material for the builds in my future. Randall
I am really excited to be taking your course! I'm excited about how you focus on efficiency. Your approach is different and more practical than most other teachers! Dave
I signed up for Robbie’s 6 day build (this May) and since I’d bought the 6 day videos as he recommended (and it has a full French polish section) I finished that guitar simply from watching the video and it turned out great. Pat
I sure enjoy referencing the new 6 day on line class as I move to each step. It's a great resource. Greg
You might want to look at Robbie O'Brien's on line guitar course. It is very detailed and allows you access to another really good forum with a massive amount of information and lots of really helpful people Jim
I really like the online classes that Robbie O'Brien offers. I have watched (on his forum for students) as many first timers without wood working experience have built their first. The classes are not inexpensive, but I found they are worthwhile. He is great teacher, having taught Lutherie in a community college, the classes are nearly real time. He also offer one week build a guitar classes from his home shop. John
I recently purchased your online 6 Day Acoustic Guitar Building and French Polishing courses. They are fun and the lessons are very clear and complete and I have been enjoying them very much. Peter
I'm very excited about this. It will be extremely useful to learn how to reduce my build time which is currently snail paced! David in Australia
Just recently I treated myself to your "build guitar in 6 days" course. It is awesome! I started going straight through... then I jumped around a little bit... My impression: fantastic! I'm going to return to the start, and I'll watch every video. With approx 8 videos watched so far, I've learned much! The pace is excellent. I appreciate your humor, and your attention to safety. Manus
Just wanted you to know, with the aid of your video's I have built 6 guitars. They have turned out quite good. Thank you for that. Patrick
I just wanted to say that the new 6-day acoustic guitar building course is excellent. As a videographer and a person who has been married to a teacher for 31 years, this course works perfect for visual learners like me :) Well done ! Chris in Canada
Thanks so much for putting out your 6 day build course, I bought it as soon as it came out and am loving it. Remi
Robbie, As a guitar tech getting into lutherie. The first thing I invested in was your steel string/classical course material. After watching you work, I powered up perfectly with 1st class instructions. Saved a bundle, I'm sure. Thanks! Rick
Even just the chapter overview adds quite a lot of value on top of what you’ve already posted on Social media. Thanks for all the excellent content you’ve produced. Eric
There is one more statement I just got to say, I think having a student involved in the process and in the video really make this course as the best video course that you ever put out. Again thanks for producing this course. Eric
So far I just went through 5 lessons and really like the course. The lessons are very detailed and informative and you just have a good nature attitude in explaining each procedure and it is not boring. Thanks for making this course and looking forward to the classical guitar 6 day course. Eric
That is an incredible amount of work for the first day. WOW!!
The 6 day course is amazing by the way, the sound and picture are great. Brad
I’m glad you have this course available. The six days I was with you was one of my most memorable experiences. Steve
Robbies teaching is Amazing! I have purchased 3 of his online courses in the past year or so, I cannot recommend Him enough. Scott
Randy Johnson here, you taught me how to French Polish and how to voice a guitar top back in June of 2020. I'm so stoked to see the 6-day building vid available! Thanks again for helping me make a dream come true!! Randy
Thanks for releasing the 6 day build video. Having used your acoustic guitar build class previously, I love seeing the efficiency you build with and am greatly benefiting from it. Jeremy