6 Day Classical Guitar Building Course

Build a Guitar in 6 days?! The secret is to work efficiently. Learn Robert’s techniques on how to do that in this course. This course offers tips and tricks for beginners to advanced luthiers and is guaranteed to make you a better luthier.

Buy Now $437.00 117 Lessons 25:33:00

About This Course

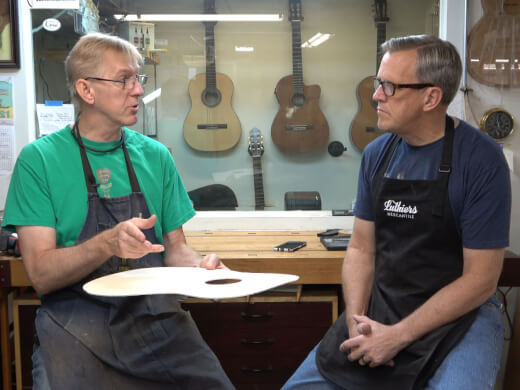
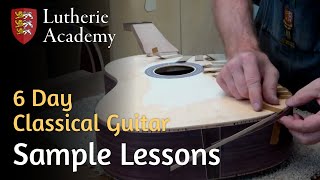
Welcome to the Robert O’Brien Online 6 Day Acoustic Guitar Building Course. In this course Robert, not only shows how he has updated and adapted his guitar building methods over the years but he also stresses the importance of working efficiently while building. In his original Classical guitar building course he teaches how to build and finish a guitar organizing each topic by chapter and lesson. For example: Chapter 1 - The neck, Chapter 2 – The sides etc. In this new 6 Day course he has it organized by days and all the steps accomplished on those days, culminating in a completely finished and playable guitar by the morning of Day 6. This means he may start by thicknessing and bending a side, then jump to joining the top and back, doing a scarf joint, making blocks, bending the second side etc. and all of this before lunch of Day one!

He also does that in the presence of students. This allows the viewer to see and hear Robert address questions and issues that may not arise in a regular style instructional video course with just the instructor teaching. The interaction between Robert and his students allows the viewer to see steps done by Robert as well as his students while he is teaching. Watch as he adapts his teaching style to meet the necessities of each student and their abilities, helping them become efficient in each step of the guitar building process. This is much more than a how to build a guitar course. If you want just that, I recommend getting my original Online Classical Guitar Building course. Now, if you want to learn more tips and tricks on building and my most up to date techniques, yes, I have changed my methods somewhat since the original course, as well as how to work efficiently, then this course is for you.

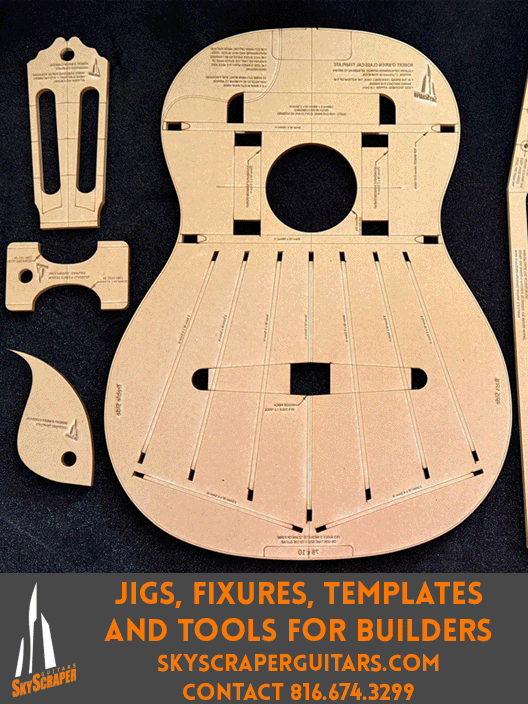
Learn about shop layout and workflow and how that can shave hours and even days off the time needed to build a guitar. Learn how few tools and jigs Robert actually uses while building.

When you purchase the course you also become eligible to join Robert’s invitation only private chat group. Here he offers advice and support as you build. There is a wealth of information available to you for free and over 15 years worth of searchable archives!

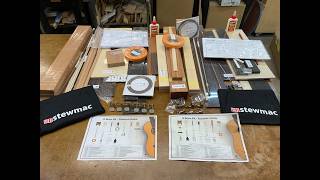
If you have ever wanted to learn how to build your own high end classical guitar and do it efficiently using Robert’s most up to date techniques, then Robert’s Online 6 Day Classical Guitar Building Course is a must! It also includes a free tool list! Just click on the link below to download.

Please read the FAQ page before beginning. To begin, just register/login and purchase the video lessons.

It has never been easier to learn the art of guitar building.

Happy Building!

Students who have taken Robert O’Brien’s in-house 6-day classical guitar building course are eligible for a 25% off discount. Please contact us to claim this offer.
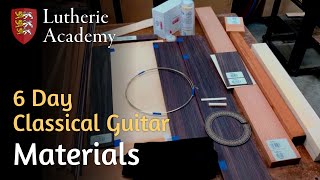
→ Free Tool List

So far, I'm loving this course! 1) Quality of the video - HD 2) Very Very natural presentation 3) Great clarification on things that aren't so obvious for a first timer, (ex. why the peg head angles differ due to the type of tuners). 4) My favorite so far are the signs by the jointer "If Dad can't fix it, We're Screwed." Hilarious 😂 Rolando
See what others are saying

Feedback

×
The course is 100% worthwhile, and allows all levels of student expertise to take part in / witness a great guitar building process. Pat
Your descriptions and video are clear and concise. This new video series should be perfect for students coming to your shop to build an instrument. I like your stress on efficiency. It’s not just about the ability to work professionally, but also satisfaction with the process and safety. Peter
So far, I'm loving this course! 1) Quality of the video - HD 2) Very Very natural presentation 3) Great clarification on things that aren't so obvious for a first timer, (ex. why the peg head angles differ due to the type of tuners). 4) My favorite so far are the signs by the jointer "If Dad can't fix it, We're Screwed." Hilarious 😂 Rolando
Chapter 1 • Day 1
7:10:48
Lesson 1: The scarf joint 20:59
Lesson 2: Cutting sides to width 13:09
Lesson 3: The Safe-T-Planer 4:01
Lesson 4: Thicknessing the sides 7:46
Lesson 5: Thicknessing the back 1:46
Lesson 6: Thicknessing with a scraper 9:55
Lesson 7: Thicknessing with a drum sander 4:15
Lesson 8: Side Layout 12:23
Lesson 9: Bending the cutaway side 12:42
Lesson 10: Thicknessing the peghead 6:33
Lesson 11: Scale layout 5:06
Lesson 12: Bending the non cutaway side 6:18
Lesson 13: Making the end block 11:14
Lesson 14: More side bending 1:43
Lesson 15: Joining the top and back 5:26
Lesson 16: Bending another side 7:47
Lesson 17: Cutting sides to length and gluing end block 15:18
Lesson 18: Cutting peghead veneers 11:08
Lesson 19: Shaping the peghead 16:32
Lesson 20: Drilling tuner holes 10:45
Lesson 21: Routing slots in peghead 23:06
Lesson 22: Carving peghead ramp into slots 14:12
Lesson 23: Cutting neck to length 14:07
Lesson 24: Cutting slots for sides 11:33
Lesson 25: Routing recess for top 4:38
Lesson 26: Rough heel shape 16:32
Lesson 27: Neck taper 4:43
Lesson 28: Attaching neck to sides 9:44
Lesson 29: Sanding the inside of the sides 15:55
Lesson 30: Radiusing the rims 8:05
Lesson 31: Installing kerfing 6:27
Lesson 32: Removing glue from top 8:00
Lesson 33: Installing the rosette 3:44
Lesson 34: Final back thickness 17:57
Lesson 35: Back reinforcement strip 2:41
Lesson 36: Making the end wedge 14:43
Lesson 37: Installing the end wedge 18:05
Lesson 38: Sanding the rosette 5:31
Lesson 39: Cutting out the top 15:37
Lesson 40: Cutting out the soundhole 5:11
Lesson 41: Scraping the end wedge flush 5:28
Lesson 42: Sanding the kerfing 16:43
Lesson 43: Making braces 3:20
Chapter 2 • Day 2
5:34:23
Lesson 1: Three ways to control stiffness and looseness 5:46
Lesson 2: Graduating the top thickness 12:39
Lesson 3: The bracing pattern 15:46
Lesson 4: The solera 13:02
Lesson 5: First glue phase 7:49
Lesson 6: The transverse braces 34:02
Lesson 7: Radiusing back braces 29:51
Lesson 8: Shaping the back reinforcement 29:33
Lesson 9: Shaping the fan braces 38:26
Lesson 10: Second glue phase 14:55
Lesson 11: More soundboard bracing 9:27
Lesson 12: Fitting braces to back 4:43
Lesson 13: Third Glue Phase 9:18
Lesson 14: Tapering and gluing back braces 5:43
Lesson 15: Final shaping of top braces 8:34
Lesson 16: Final shaping of back braces 6:19
Lesson 17: Fitting the top to the rims 30:11
Lesson 18: Fitting back to the rims 4:25
Lesson 19: Closing the box 3:46
Lesson 20: Flush trimming 6:49
Lesson 21: Cutting binding channels 7:29
Lesson 22: Binding channels around the neck area 12:15
Lesson 23: Installing bindings on the top 4:00
Lesson 24: Installingbindings on the back 19:35
Chapter 3 • Day 3
5:08:45
Lesson 1: Removing the binding tape 4:27
Lesson 2: Scraping the bindings on the back and top 6:59
Lesson 3: Scraping bindings on the side 12:00
Lesson 4: Slotting the fretboard 11:47
Lesson 5: Tapering the fretboard 9:31
Lesson 6: Thicknessing the fretboard 9:39
Lesson 7: Fretboard length 10:08
Lesson 8: Attaching the fretboard to the neck 8:16
Lesson 9: The heel cap 20:42
Lesson 10: Neck carving Step 1 12:07
Lesson 11: Neck carving Step 2 13:17
Lesson 12: Neck carving Step 3 Part I 6:51
Lesson 13: Neck carving Step 3 Part II 4:36
Lesson 14: Leveling the fretboard 6:41
Lesson 15: Installing frets 6:23
Lesson 16: Fretwork 27:43
Lesson 17: Sanding the neck 13:28
Lesson 18: Sanding the body 29:42
Lesson 19: Pore filling the neck 30:16
Lesson 20: Masking the fretboard and bridge location 30:25
Lesson 21: Sealing the top 25:15
Lesson 22: First Zpoxy pore filler application 8:32
Chapter 4 • Day 4
3:57:23
Lesson 1: Sanding the pore filler 7:27
Lesson 2: French polishing the top Part I - Sealing 17:05
Lesson 3: French polishing the top Part II - Polishing 17:14
Lesson 4: Calculating bridge thickness 11:57
Lesson 5: Thicknessing the bridge blank 5:42
Lesson 6: Roughing out bridge on tablesaw 14:07
Lesson 7: Shaping bridge wings 38:14
Lesson 8: Bridge tieblock bones 14:01
Lesson 9: Drilling string holes 14:01
Lesson 10: Final shaping and sanding 32:33
Lesson 11: French polishing the top Part III 40:46
Lesson 12: Second pore filler application 9:37
Lesson 13: Sanding the pore filler 11:03
[Extra] How to mix shellac flakes 3:36
Chapter 5 • Day 5
1:40:53
Lesson 1: Attaching the bridge 15:24
Lesson 2: French polishing the back, sides and neck - Part I 45:33
Lesson 3: French polishing the back, sides and neck - Part II 39:56
Chapter 6 • Day 6
1:31:34
Lesson 1: Cleaning the fretboard 9:23
Lesson 2: Fitting the nut 15:25
Lesson 3: Slotting the nut 11:34
Lesson 4: Making the saddle 16:50
Lesson 5: Installing the tuners 5:57
Lesson 6: The label 4:25
Lesson 7: The strings 14:07
Lesson 8: Setup 13:53